The post TENANTS VS LANDLORDS RELATIONSHIPS appeared first on ServiceMaster Restoration by Zaba.
source https://www.servicemasterbyzaba.com/blog/tenants-vs-landlords-relationships/
When we help Rosemont, IL homeowners with water damage restoration, we’re often asked about how to identify hidden leaks. This type of plumbing failure is hard to spot, and that’s why it causes so many problems.
The best handyperson skills don’t let you see through walls or under the floor. A moisture meter can fine-tune the detection work, but only if you’re familiar with how it operates. We do have good news.
You don’t need X-ray vision or a professional tool box. You do need to know where to look and what to look for. As Rosemont’s leading water damage pros, we can help.
It’s hard to miss puddles under the kitchen sink. You take care of it by fixing the leak right away. Slow drips behind walls and inside ceilings aren’t as obvious. By the time you realize something’s wrong, water damage has already set in.
These are just a few of the ways hidden plumbing problems damage Rosemont homes.

If you can’t see it happening, it’s hard to know you have a hidden leak. Make things a little easier by routinely checking the house for plumbing problems. Stay on the lookout for these seven signs of water damage in your home.
When moisture seeps into drywall, it causes the material to flake and crack. Blistered paint and peeling wallpaper are also clues to water damage behind walls.
Power Tip: When you inspect walls for signs of hidden leaks, be sure to check corners where they meet, as well as seams where walls meet floors and ceilings.
Most homeowners don’t pay much attention to ceilings until it’s time to change a light bulb. Put ceiling surveys on your list of ways to scout for water damage. Stay on the lookout for dark spots or water rings.
Power Tip: Never ignore buckled or bulging ceiling tiles. They’re sure indicators of a potential ceiling cave-in, so call a water damage professional right away.
Take a monthly tour barefoot through each room of the house. Don’t miss areas where there isn’t much foot traffic. Signs of water-damaged flooring include warped boards, loose tiles and damp carpets. If you run across any of these clues, you’re probably also dealing with water-damaged subflooring.
That network of supply pipes in the attic needs to be checked on a regular basis. Use a powerful flashlight to illuminate dark corners as you scan for signs of water damage. Stains on support beams and joists are cause for concern, as well as damp or moldy insulation.
Hairline cracking, flaking and efflorescence on concrete walls are all indications of water damage down in the basement. If your basement is finished, look for stained or streaked drywall and damp floors.
It’s not a ghost running the water when all the faucets are off. That rushing, dripping or thumping sound behind the wall is usually evidence of a plumbing problem.
Power Tip: Take care of this inspection routine late in the evening when traffic outside slows down. Turn off TV sets and electronics that might interfere with your sound check.
Lingering musty smells can be clues of mold growing inside the walls of your home. The source of this unhealthy fungal invasion is often hidden water damage spreading through drywall and wood framing.

The water damage signs we’ve covered can point to plumbing problems with DIY solutions. However, there are situations that need the attention of restoration pros as soon as possible.
It’s hard to know what might be behind a stained wall or under a mushy floor. If you have concerns about the signs of water damage in your home, don’t take any chances. Call us.
Our certified technicians give you a clear picture of the problem and explain your options. When Rosemont homeowners need help with water damage, they know they can count on ServiceMaster by Zaba. You can too: 773-647-1985.
The post 7 Sure Signs of Water Damage in Rosemont, IL Homes appeared first on ServiceMaster Restoration by Zaba.
When plumbing starts to leak, you take care of it right away. Whether you call water damage pros or fix it yourself, the problem gets solved. Now, you’re facing one more big job: plumbing leak cleanup.
This work can’t wait either. From floors, walls and cabinets to personal belongings, it all has to be cleaned and dried as quickly as possible. Otherwise, moisture spreads, mold sets in, and the job gets harder. Our teams here at ServiceMaster by Zaba see it every day.
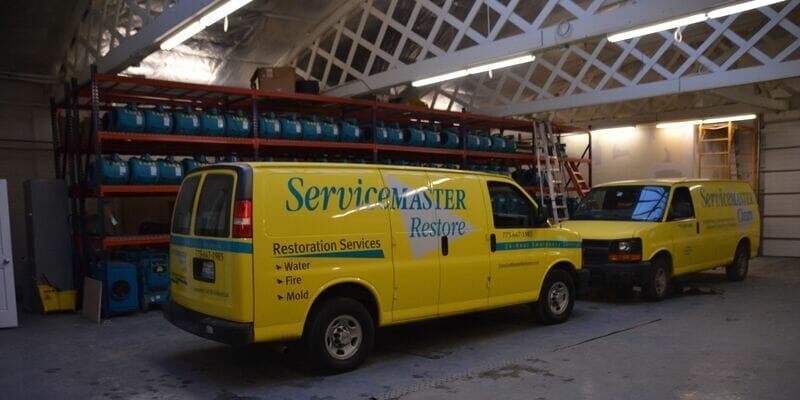
We specialize in water damage services and emergency pipe leak repair for Chicago homes and businesses. We can help.
Let’s break down the key points you need to know about cleaning up after a plumbing leak.
It’s easy to take plumbing for granted. Copper pipes, PEX drain lines and PVC pipes keep your home’s water supply under control and running smoothly.
When something does go wrong with the system, it’s usually one of these common causes of water leaks in home plumbing.

All plumbing leak cleanup jobs start with the basics. Locate the problem, and fix the water leak. If the weather cooperates, open windows in the affected areas. Follow these five steps for cleaning up after a plumbing leak.
If you plan on filing a homeowners insurance claim, take pictures before you start cleanup. Save the documentation as proof of damages for your adjuster. Next, give yourself room to work by moving things out of the way. Many items will dry more quickly outside, but keep an eye on the weather.
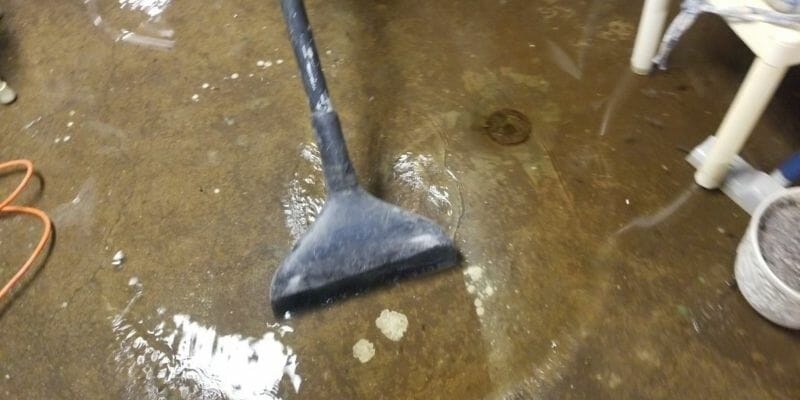
Water extraction techniques depend on the size of the plumbing leak. If you’re dealing with damp floors, a mop or clean towels should be enough. However, a wet-dry vac works better on both wet floors and areas with standing water.
You may want to lease the equipment, so consider renting a large dehumidifier too. Small home dehumidifiers can’t handle the capacity you need to dry out floors, walls and cabinets.
Water leaking from a drain line or an appliance hose is considered contaminated. Even clean water from a supply line leaves behind moisture that breeds mold and mildew. It’s important to clean and disinfect all surfaces.
Start by scrubbing everything with a low-sudsing detergent. Next, disinfect non-porous surfaces with a solution of bleach and water. Finish remaining areas with products formulated for disinfecting porous surfaces.
If the weather isn’t too humid, open windows and set up large fans to create cross-currents of fresh air. Position the dehumidifier in the center of the room. Check walls daily with a moisture meter, but be patient. Plan on letting the equipment run 24/7 for two or three days.
Power Tip: Reduce project drying time by leaving closet and cabinet doors open.
Once everything is dry, carefully inspect it all for signs of structural damage. Drywall may need to be torn out and replaced. Check floors, carpets and padding for mold. If you have doubts about repairs, don’t try to salvage anything. Instead, replace water-damaged materials, or call in certified restoration professionals.
A wet-vac removes most of the water from soaked flooring, but residual moisture causes long-term problems. These tips help dry the floor quickly after a plumbing mishap.
It’s not always possible to salvage soaked carpet and vinyl floor coverings, so be prepared to dispose of these materials. Be sure to look for signs of water-damaged subflooring.
Leaking supply and drain lines under sinks can flood kitchen and bathroom cabinets. Whether they’re constructed of solid wood, plywood or particle board, cabinets need extra help drying out.
No matter how many times you’ve tackled plumbing leak cleanup, it’s not an easy project. You may have second thoughts. If the job seems too big, call a restoration company that specializes in water damage cleanup. If you’re facing any of these situations, contact the pros right away.
When used with large fans or air movers, a dehumidifier shortens the time it takes to dry out affected areas. If the water damage isn’t extensive, plan on running a dehumidifier for at least 24 to 48 hours. Large projects take longer. Regularly empty the dehumidifier collection bucket.
After a plumbing leak, mold spreads quickly in damp, porous materials, such as drywall and carpet. Mold from water damage sets in as soon as 24 to 48 hours. The microscopic fungus invades wood framing, causes long-term structural damage, contaminates interior air and impacts your health.
In most cases, the answer is yes. It’s hard to finish a large DIY leak cleanup job in 24 hours. The drying process takes several days, so it’s important to disinfect all water-damaged surfaces. A certified restoration company uses advanced structural drying techniques to mitigate the problem.
Repair costs vary depending on the extent of pipe repairs and water damage. On average, plumbing repair ranges between $150 and $350. The cost of professional cleanup and restoration services averages from $2000 to $4000.
Homeowners insurance usually takes care of the cost to fix a broken pipe and also covers certified cleanup and restoration services. Our teams work closely with local and national insurers, and we’re always happy to help you navigate the paperwork and file your water damage claim.
Cleaning up a water-damaged house can quickly turn into a homeowner’s headache. Knowing how to prevent leaking pipes can save you the aggravation. These tips make a big difference.
There’s so much to be done after a plumbing leak: fixing the problem, cleaning, disinfecting and replacing water-damaged materials. It’s a big job, but you don’t have to handle it by yourself.
We can help with a full line of services for Chicago homeowners, including plumbing leak repair, water damage mitigation, mold removal and property restoration. You can depend on ServiceMaster Restoration by Zaba.
We’re here for you 24/7, and we’re always ready for your call: 773-647-1985
The post How to Clean Up Water Damage After a Plumbing Leak appeared first on ServiceMaster Restoration by Zaba.
From poolside bar service to patio dining, the great outdoors extends your hospitality business. Spotless furniture outside reflects the professional focus you put on keeping guests happy. Knowing how to clean outdoor cushions makes sure your venue makes the best impression.
It’s just one of the specialty services we provide for hotels and restaurants in Chicago. ServiceMaster by Zaba is proud to be the city’s leading commercial cleaning business, and we enjoy sharing that expertise.
Let’s take a look at patio furniture cleaning ideas that can make this big project easier on your in-house staff. We’re including some of our best power tips too.

Whether you own or manage, you know how quickly dirty furniture creates a negative guest experience. From customer seating to office chairs, your staff keeps interior furnishings clean and inviting. Outdoor patio cushions and cabana pillows don’t always get the same attention.
Outside seating dulls with everyday wear. Add mold, tree sap and oily spills, and expensive outdoor furniture loses its welcoming appeal. This guide helps protect your investment and your commitment to guest satisfaction.
Removable covers let you bring outside furniture cleanup inside. However, before washing outdoor cushions in the washing machine, vacuum them first. Run an upholstery attachment on both sides of each cover.
This trick loosens up accumulated dirt and helps you spot problem areas that need additional attention. Check cushion labels for instructions on recommended types of laundry detergent and drying temperatures.
Power Tip: Drying removable covers outside keeps them from shrinking and freshens the fabric.
When you don’t have the convenience of removable covers, plan on working outside. You’ll need the following supplies.
Before cleaning patio cushions that don’t come off, move pieces located over grassy areas onto concrete or paved surfaces. Otherwise, washing and rinsing over open ground can create a muddy mess.
A shop vac speeds up this first step, but be sure to use its upholstery attachment. As the vacuum pulls up loose dirt and debris, be careful around trim and seams.
Power Tip: A soft-bristled brush works well on sweeping out deep seams around cushions.
Wet down outdoor cushions with clean towels and a mixture of liquid dish detergent and warm water. Work the solution into the material, and then let it set for five minutes.
Next, use a clean soft-bristled brush to firmly scrub cushions. Give them a few minutes to drain, and repeat brushing and scrubbing. It may take several passes before you see results.
Power Tip: Loosen deep-set dirt by scrubbing cushions side to side and then up and down.
Rinse outdoor cushions using a garden hose and low-pressure spray attachment. Never use pressure washer equipment on furniture outside. It can tear fabric and damage frames.
Blot freshly washed patio cushions and pillows with clean towels. Squeeze out as much excess water as possible around seams and edges, and air dry. A sunny day and southern exposure should finish the job.
Dirty cushions can spoil an outdoor event, so always check their condition between shifts. When you run into a problem that needs attention right away, contact a commercial cleaning company like ServiceMaster Restoration by Zaba in Chicago. Their equipment and techniques greatly reduce cushion cleaning and drying time.

Outdoor cushion and pillow covers are made with highly durable materials. From acrylics to olefin fabrics, they’re manufactured to resist mold and mildew.
Busy outdoor furniture in commercial settings presents a different type of problem. In addition to the weather, patio spills and poolside splashes add extra layers of moisture that cause mold growth on cushions.
These steps get rid of it:
The same finish that makes outdoor upholstery mold-resistant also helps it resist staining. Over time, most patio and poolside furniture loses that protection, so be ready with these stain-removing strategies.
• Sprinkle oily cushion stains with baking soda or cornstarch.
• Give the powder 15 minutes to absorb oily residue.
• Use a dull straightedge to gently scrape away the powder.
• Repeat as needed, and finish with an upholstery stain remover.
• Pre-treat cushions by soaking stains with a heavy-duty laundry detergent.
• Work detergent into affected areas with a soft brush, and rinse thoroughly.
• Soak grass stains with a mix of oxygen bleach and warm water.
• Wait one hour, wash cushions again, rinse, and air dry.
• Apply an enzyme-based stain remover to cushions.
• Sprinkle with powdered detergent to create a paste.
• Scrub with a brush, rinse with hot water, and air dry.
• Oxygen bleach can also remove tree sap from outdoor upholstery.
Outdoor service is an important part of business for so many Chicago restaurants and hotels. Between taking care of guests and general upkeep, your busy staff doesn’t always have time for extra jobs like cleaning outdoor cushions.
We understand the hospitality industry, and we can help. Our outdoor cushion cleaning services make sure your customers feel welcome and comfortable when they take a seat. Leave the extra work to Chicago’s best commercial cleaning company. Call ServiceMaster by Zaba today for a free quote: 773-647-1985.
The post How to Clean Commercial Outdoor Cushions Like a Pro appeared first on ServiceMaster Restoration by Zaba.
You know the importance of bringing in professional area rug cleaners once or twice a year. Still, there comes a time when you have to do it yourself. Whether it’s dirty fringe or a greasy spot, you’re ready to tackle the job.
Before you get started, take a minute, and take a look at our DIY tips for rug care in Park Ridge homes and businesses. From cleaning basics to maintenance pointers, our area rug pros have you covered.

Your beautiful area rugs add so much to your home. They help interiors stay fresher by trapping airborne contaminants. Rug padding keeps feet comfortable and holds down noise in busy households.
Eventually, another pass with the vacuum isn’t enough. It can’t clean up deep-seated dirt or accidents that demand attention right away. Our 12-point guide walks you through everything you need to know about area rug care.
Please note: While you can clean most area rugs, don’t take chances with antique, oversized or Oriental rugs. Our Park Ridge area rug cleaning services are always available.
Start by carefully vacuuming the area rug surface. An upholstery attachment works well on smaller rugs. Don’t vacuum against the pile. Keep nozzles and beater bars away from fringe and tassels. Finish by vacuuming the rug’s backing.
Try out a tiny dab of cleaning solution on a discrete spot. If you’re concerned about different products, stay colorfast safe with a mixture of warm water and mild liquid dish soap. Never use hot water. It can fade colors and shrink fibers.
If the weather cooperates, move your area rug outside. Drape it over a secure railing or several outdoor chairs, and soak it with the garden hose. This step can be done in the bathtub. Apply your cleaning solution, gently the scrub rug front and back, and let it set for 5 minutes.
Throughly rinse the rug by working from top to bottom. When all traces of suds are gone, give it one last rinse to be sure. If you’re cleaning the rug inside, a handheld shower head makes the job easier.
A window squeegee is a good choice for removing excess water from the clean rug. Before you start, check the tool’s rubber blade, clips and channel for nicks or damaged edges that might snag the rug. Work the squeegee with a gentle downward motion in the same direction as the natural lay of the fibers.
Firmly straighten the rug so that it hangs over a secure stand. Drying outside freshens up rug materials, but you can use fans to speed up the process indoors. It can take six hours or longer. Once the rug is dry, refresh fibers and pile with a final vacuuming or hand-brushing.

Gently clean tassels and fringe with the same mild solution you used to clean the rug. Wash small sections with a microfiber cloth or sponge, rinsing as you work. Blot dry, and straighten fibers with your fingers or a wide-tooth comb.
Work baking soda into stained rug fibers. Let it set for 5 minutes, vacuum, and repeat to absorb grease. Using a toothbrush, gently scrub the affected area with cleaning solution. You may have to repeat the process several times.
Baking soda often removes odors from area rugs. Thoroughly dust fibers with baking soda, wait 30 minutes, and then vacuum. If odors persist, let professional rug cleaners handle the problem.

Location makes a big difference in the care and maintenance of rugs. Place them where they’re least likely to encounter frequent spills or heavy foot traffic. Area rug danger zones include dining rooms, busy hallways and kids’ bedrooms.
Reduce rug wrinkles and frayed edges by being careful with their placement. Make sure rugs extend under all pieces of furniture in the area. Give oversized rugs an 8- to 24-inch clearance between rug and walls on all four sides. Rotating furniture several times a year also helps.
Don’t try to clean torn area rugs or rugs damaged by fire, water or moths. Contact an experienced rug cleaning service near you like ServiceMaster by Zaba that specializes in solving damaged rug problems. For example, our teams are industry-certified in all types of area rug repair and restoration.
We always enjoy sharing insider tips for cleaning your home like a pro. Our certified teams are here for you with top-rated Park Ridge area rug cleaning, and we take care of carpet cleaning and upholstery cleaning too.
When you want the very best for your area rugs, call ServiceMaster Restoration by Zaba: 773-647-1985.
The post Park Ridge Rug Cleaning Tips You Need to Know appeared first on ServiceMaster Restoration by Zaba.
It doesn’t take long to mop up a spill on the kitchen floor. If water splashes out of the tub, you throw down a couple of towels. These routines work great on small mishaps.
When you’re facing serious home water damage across multiple rooms, you need an action plan. You need to know what to do first and how to minimize your losses.
As Chicago’s leading water damage restoration company, we help homeowners deal with water damage every day. We want you to be prepared to take important steps as soon as you can. Preventative strategies make a big difference too. This complete guide to residential water damage covers it all.
Let’s dive in.
Fortunately, widespread water damage doesn’t happen as often as a wet floor in the kitchen or bath. When it does, the size of the problem seems overwhelming. You wonder where and how to start.
If you’re suddenly dealing with water damage in the house, knowing what to do makes a big difference. Follow these 10 steps for recovering your home and belongings as quickly as possible.

Locate the source of the water. If it’s a faulty line under the sink or behind the toilet, close the supply line valve. If it’s a leaking pipe, repair it with epoxy putty, pipe tape or a patch and clamp kit.
Power Tip: If you can’t pinpoint the problem, turn off your home’s main water supply, and call a licensed plumber.
In most cases, residential water damage is covered by homeowners insurance. Talk to your agent, and schedule an inspection to assess losses. Ask for the name of a certified water damage restoration business. You may need help with cleanup, repairs and reconstruction.
Take pictures of all your affected belongings, including furniture, appliances, electronics and clothing. Document water-damaged walls, ceilings and floors. Keep all the photos in one digital file folder for sharing with your insurer.

Next, take a close look at the condition of personal belongings. You might be able to clean some lightly damaged items. If you’re not sure, ask a restoration company for help. Our technicians here at ServiceMaster by Zaba specialize in salvaging all types of flood and water-damaged belongings.
Start by protecting yourself from injuries and waterborne bacteria with solid working gear. Suit up in heavy rubber boots and long-cuff gloves. You may also want to shut off electricity to the affected areas.
If you don’t have a shop vac, rent one at the home improvement center. It’s possible to mop up standing water, but a good wet vac quickly takes care of the job. Use heavy-duty extension cords to run the equipment in rooms where you’ve turned off the electricity.
Power Tip: Know when the vac canister is almost full by listening for sound changes in its motor.
If possible, rent large air movers and dehumidifiers to speed up the drying process. Ordinary box fans work, but you want to circulate as much air volume as possible. Set up the equipment so that it creates crosscurrents through water-damaged areas. Let everything run 24/7 for at least three or four days.
Arm yourself with an assortment of disinfecting cleaners. Check product labels so that you’ll know which are safe for use on porous materials. Go over all surfaces, including walls, ceilings and floors. Follow up with repairs and restoration as needed for water-damaged drywall, ceilings and floors.
Mold mitigation is a critical part of home water damage restoration. Treat all affected surfaces with an antimicrobial product formulated to kill mold. You can use a bleach and water solution on most non-porous materials, but anti-fungal products are a safer choice.
Repairing a home after water damage can become a big project. It also poses personal safety risks. Replacing a soggy ceiling involves heavy ladder work. Cleanup after a sewage spill exposes you to dangerous pathogens. If you have any doubts about doing it yourself, call a water damage restoration company.
Power Tip: Here at ServiceMaster by Zaba, our industry-certified technicians have the resources and equipment it takes to get big jobs done quickly and efficiently.

Storm flooding can hit any time of year, but it’s become a spring ritual for many parts of the country, including Chicago. Natural flooding events leave behind unique water damage problems.
Floodwater is filled with all types of debris that complicates cleanup. It also carries hazardous chemical and organic contaminants. We recommend a two-pronged approach to dealing with the problem.

Sometimes, large water damage problems start out small. Given enough time, a tiny leak can ruin a ceiling or flood a basement. Stay on the lookout for these signs of trouble inside and outside the house.
1. Ring-like stains on ceilings may be caused by loose shingles or flashing problems on the roof.
2. Damp insulation in the attic is another a sign of water leaking through the roof.
3. Blistered paint and peeling paper often indicate water damage in the walls of your home.
4. Warped or loose baseboards are also signs of water damage hiding inside walls.
5. Soft spots in floors, especially around bathtubs, occur when plumbing fixtures fail.
6. Tile or laminated wood floors warp and crack when exposed to moisture for long periods of time.
7. Mold and watermarks under sinks may be the result of faulty supply lines or fixtures.
8. Persistent, musty smells can be signs of hidden water damage in the house.
9. Basement walls can stain and crack due to water accumulation around the foundation.
10. Clogged gutters often spill rain and debris down exterior walls, soaking window and door frames.
In most situations, homeowners insurance covers residential water damages. This includes small and large flood problems caused by frozen burst pipes, leaky plumbing and broken appliances.
Check with your agent for details about your coverage. Policies routinely pay for professional cleanup, water removal, water damage mitigation and property restoration. An experienced water damage contractor takes care of the work and also help you process the insurance claim.
It’s important to note that traditional homeowners policies don’t cover natural flood events. However, you can protect your house and belongings by purchasing flood insurance through the National Flood Insurance Program.
There are situations that turn residential water damage restoration into a very big job. For example, structural material exposed to water for more than 24 hours needs to be torn out and replaced. Mold growth hiding deep inside walls requires specialized mitigation techniques.
When you’re facing more than you can handle, let us help. You can count on ServiceMaster by Zaba for the best residential water damage restoration services in Chicago and the Suburbs. We’re just a phone call away: 773-647-1985
The post 10 Important Steps to Take After Water Damage in Your Home appeared first on ServiceMaster Restoration by Zaba.
The devastation left behind after a house fire is difficult to deal with emotionally and physically. The flames are out, the first responders are gone, but the challenges are still there. You’re looking at extensive fire and smoke damage.
No one is ever prepared for a situation this overwhelming.
We know. For more than 10 years, we’ve provided expert smoke damage restoration for Chicago home and business owners.
Let’s take a closer look at what to expect after a fire and how to get things under control. You want to be ready if the worst should happen. This guide can help.

The smoke cleanup process would be easier to navigate if all fires produced the same type of damage.
They don’t, and that complicates the work.
Different materials create different sets of smoke remediation problems.

You can see the effects of smoke damage on streaked walls, discolored floors and stained ceilings. What you can’t see are residual chemicals and carbon particles left behind in layers of soot covering every surface.
The contamination becomes trapped inside wall cavities. It permeates insulation, spreads into areas over the ceiling and seeps into subflooring. Most concerning, exposure to acidic soot can cause serious respiratory problems.
To protect your property, belongings and health, you need to start cleanup as quickly as possible. It’s also very important to wear OSHA-rated respiratory gear while you’re working.
Your first concerns during a house fire are always centered on immediate evacuation and everyone’s safety. Once the flames are out, you navigate a plan for returning home. That’s when you realize smoke damage in the house affects everything from furnishings to personal belongings.
Within minutes of smoke exposure, your home’s contents are covered with sticky soot that leaves permanent stains. After just a few hours, the residue penetrates porous structural materials, drywall and tile grout.
If several days pass without smoke damage restoration, irreversible discoloration sets into carpets, drapes, upholstery and bedding. If a week or more goes by, corrosive soot permanently etches and pits glass in windows, shower doors, mirrors and picture frames.
First, give your property a room-by-room inspection. Make note of deep stains and heavy layers of soot, but look for less obvious signs of smoke damage, such as light discoloration on walls and ceilings.
As you work through each room, sort out personal belongings. Bag and move ruined items outside for disposal. This helps control smoke odor inside. Transfer things that may be salvageable to a location unaffected by the fire.
Finally, put together the following work gear and smoke damage cleaning products.
This type of restoration starts with careful soot removal from all surfaces and finishes up with property-wide smoke cleanup and deodorizing techniques. These six steps outline the process. Always suit up in your personal protection gear before beginning the work.
Fresh air currents help reduce smoke odors, so keep windows and doors open during cleanup. Leave fans running in rooms that need to dry, but turn them off while you’re working on soot removal in these areas.

Start by laying down plastic drop cloths. Remove powdery soot from furnishings with a HEPA filter vacuum. Slowly pass the vacuum’s upholstery attachment over affected areas, but don’t press the nozzle into surfaces.
Hold it so that the residue is drawn upward and into the vacuum attachment. This technique minimizes the risk of embedding contaminated particles deeper into soot-covered surfaces.
Power Tip: Renting a soot vacuum or shop vac makes this job a little easier.

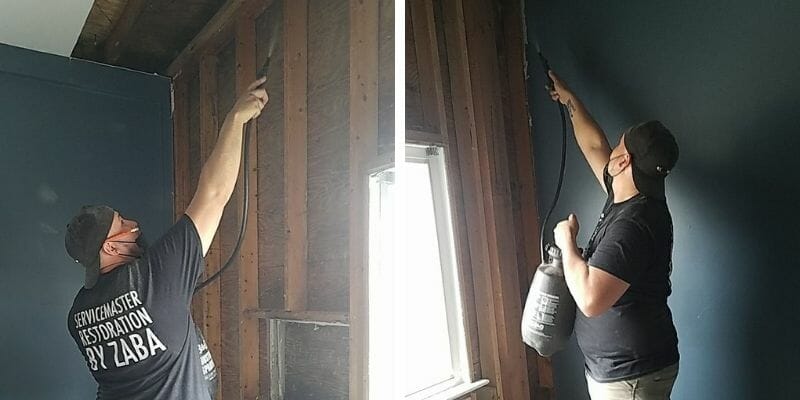
Running the vacuum on walls and ceilings isn’t practical. Instead, use a dry sponge specifically made for cleaning up soot. The material in these vulcanized rubber products absorbs the powdery residue, so don’t overload the sponge.
Pass it over surfaces with vertical, overlapping strokes. Wipe away soot a few inches at a time, working from the bottom of walls towards the ceiling. This helps reduce streaking. Clean the ceiling with the same overlapping stroke technique.
Power Tip: Get more mileage out of dry sponges by slicing off soot-saturated areas to expose fresh cleaning material.
Once you’ve removed surface layers, finish cleaning with a mixture of 1 gallon of warm water and 1 tablespoon of degreaser. You can also use a solution of warm water and white vinegar. The combination of dry sponging and degreasing also removes soot from glass.
Power Tip: Degreasers are strong chemical cleaning agents, so follow product instructions carefully.
Soot cleanup is the biggest part of smoke damage restoration. Vacuums and sponges remove surface contaminants, but you still have to deal with strong, unpleasant smoke odors. Eliminating this invisible problem takes time and patience.
DIY options include setting out bowls of vinegar or baking soda in smoke-affected areas. You can also use small bags of activated charcoal to absorb lingering odors. Fire-damage restoration pros handle the job with specialized equipment that speeds up the process.
Power Tip: Optimize baking soda’s effectiveness by spreading it in thin layers in large cookie sheets.
In most situations, it’s better to let fire damage restoration pros handle this step with specialized equipment that speeds up the process. Our teams use thermal foggers with solvent-based deodorizers to quickly eliminate heavy smoke odors. We also work with advanced ozone generators in affected areas.
Disclaimer: This type of equipment is only meant for professional use by industry-certified technicians.
Furniture, bedding and clothes that weren’t directly exposed to soot and smoke can be cleaned and washed. However, it’s best to let a restoration company take care of fire-damaged belongings.
For example, our teams here at ServiceMaster by Zaba can often salvage belongings that survived the initial flames. We help homeowners recover furniture, electronics and personal items, including photos, artwork and important documents.

As we’ve noted, some items can be saved after a fire. Lightly smoke-damaged clothes can be cleaned by pre-washing with a cup of baking soda or vinegar. Restoration specialists can salvage a wide range of personal belongings.
However, the building components and surfaces inside your home present a different set of challenges. These are just a few post-fire problems that need attention from certified fire damage professionals.

Fire restoration technicians use special equipment and advanced techniques to restore a home, but some damage can’t be repaired. When we assess a property immediately after a fire, we look for these signs of irreversible damage.

When you call in an experienced fire restoration company like ServiceMaster by Zaba, highly trained technicians take care of everything. They remove soot from all surfaces, eliminate smoke odor and replace damaged drywall. Letting pros do the heavy work also comes with these benefits.
It’s always very difficult to deal with the aftermath of a house fire. Cleanup can quickly overwhelm your best recovery plans. Don’t try to take care of extensive soot and smoke damage by yourself. Let us help.
Our teams get the job done quickly and efficiently. From caustic soot removal to smoke odor elimination, we specialize in restoring fire-damaged properties and belongings. We work just as hard to restore your peace of mind.
When you need us, we’re here for you at ServiceMaster Restoration by Zaba: 773-647-1985
The post 6 Steps for Proper Smoke Damage Restoration appeared first on ServiceMaster Restoration by Zaba.
If you’ve never done it before, you may not know where to start. If you’re familiar with this type of home repair, you know it can get complicated. Don’t let it sneak up on you. Now’s the time to brush up on how to fix a leaking pipe.
We can help.
Our water damage pros take care of emergency leak repair in homes and businesses all across Chicago. We understand what you’re dealing with.
Let’s start with a quick overview of different pipes and repair routines. Add our tips on fixing leaks behind walls and under kitchen sinks, and you’ll be ready to repair pipes anywhere in the house.

Your home’s plumbing stays busy 24/7 handling water distribution, fluctuating pressures, temperature extremes and everyday use. In order to accommodate different conditions and locations, the system typically operates with a combination of these five types of pipe.
When you’re deciding on how to fix a leaking pipe, think about its material and location. For example, pipes leaking in the garage are usually a bigger repair problem than a supply line under the bathroom sink.
Most DIY pipe repair jobs start with one of three basic fixes. Keep in mind that these are considered temporary. Once you have things under control, bring in a professional for permanent pipe repair.

Most pipe leaks are obvious. You spot the damage and get to work. If you don’t see the source right away, trace the leak upward along the pipe’s length. This detective work is especially important in apartment and condo buildings.
Once you confirm the leak’s location, turn off the water supply to the damaged line. Supply lines feature shut-off valves that stop water flow with a clockwise turn. Otherwise, shut off the main water supply coming into your home.
You can sometimes stop a leaking pipe with water in it by using a pipe tape kit, as described above. Otherwise, wait a few minutes, and then empty lines near the leak.
Power Tip: Keep a tape repair kit, patch and clamp combo and epoxy putty in your DIY toolbox.
Identify the type of pipe you’re working with. Take a close look at the size of the leak or break. This gives you a better idea of which pipe fix will work best. Make the repair, and then slowly turn the water supply back on.
Inspect your work to make sure your temporary fix for the leaking pipe holds. Finally, call emergency water leak pros, like our teams here at ServiceMaster by Zaba in Chicago, IL who can clean up the water damage.

By the time you notice signs of pipe leaks behind a wall, the damp has already spread beyond visible stains or peeling paint. This type of repair can quickly turn into a big job, but it needs attention right away.
Slice out a rectangular portion of drywall over the affected area. Give yourself space to inspect the leak and room to work. Follow one of the repairs outlined above, and then finish by drying out walls and affected spaces.
If drying and restoring the walls seems like too big of a DIY project, our technicians can help. We take care of leaky pipe water damage too — we can handle the entire job!

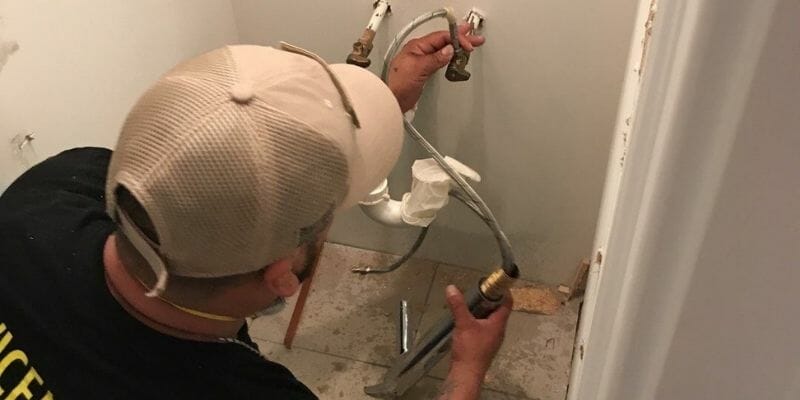
Leaking pipes under the sink are usually easier to repair than drips behind the walls. However, you have a variety of possible suspects under kitchen sinks, including these common components.
Most pipes under the sink can be temporarily repaired with epoxy putty, but a large drain pipe leak needs a clamp and patch kit. You may also want to tighten, seal or replace pipe joints, supply line retention nuts and valve O-rings.
When you consider the average cost of pipe leakage repair, it often makes sense to leave the job to professionals. Expect to pay between $150 and $350 for leaky pipe repair. Water-damaged drywall restoration can add from $250 to $750 or more to the final project cost.
We recommend adding one more item to your DIY toolbox: our contact information. You can fix most emergency pipe leaks by yourself, but you don’t have to. If it’s more than you want to deal with, let us help.
We’re here 24/7 with Chicago’s best water damage restoration services, and we take care of the suburbs too. Our teams are always just around the corner, ready to fix emergency pipe leaks: 773-647-1985
The post How to Fix a Leaking Pipe Anywhere in the House appeared first on ServiceMaster Restoration by Zaba.
Water leaking behind siding isn’t always obvious right away. Your home’s exterior appears to be in good shape, but you don’t see moisture seeping behind siding and slowly causing water damage. Over time, the damp creeps through sheathing and insulation. It can ruin interior walls, ceilings and floors.
With a little knowledge about siding leak detection and siding repairs, you can solve this problem.
ServiceMaster by Zaba restores water-damaged homes in Chicago and the suburbs every day. We know why siding leaks happen, how to spot them, how to fix leaky siding and how to prevent it from happening again.
Let’s take a closer look under the vinyl siding on your house.

Vinyl siding is a very popular choice for residential construction. It’s affordable, durable and low-maintenance. Vinyl’s waterproof composition is another plus, but the material is designed to expand, and that can cause problems.
These are a few examples of how moisture gets trapped behind your home’s siding.
Unless the material is old or badly worn, you don’t usually notice signs of water leaking behind the siding. However, there are clues that show up inside and outside the house.
Be on the lookout for these indicators of leaky siding.
Because the material is waterproof, vinyl siding tends to trap moisture that accumulates behind it. The damp permeates your home’s wood sheathing and seeps into insulation sheets between exterior and interior walls.
The result is often extensive hidden mold growth. The fungus goes undetected until you see visible signs of mold on interior walls. You may also notice a pervasive musty smell throughout the house.
Yes, water leaks behind your home’s siding can lead to structural damage. Whether it’s installed over plywood or OSB sheathing, the material interferes with natural evaporation. Accumulated damp behind siding results in wood rot.
Most homeowners can dry out damp interior walls with the right DIY techniques and equipment. However, heavy-duty structural drying is a process that belongs in the hands of water restoration professionals. Our teams here at ServiceMaster by Zaba offer this specialized service to residents all across Chicagoland.

Knowing how to stop water from seeping under exterior walls depends on figuring out why it’s leaking behind the siding. There are several ways to approach this type of repair.
1. Start by rounding up a caulking gun and sealant; you may need a sturdy ladder too.
2. Closely inspect exteriors adjacent to the signs of leaking siding that we covered earlier.
3. Seal siding from water by applying a plug of elastomeric caulk to small surface cracks.
4. Caulk siding leaks around doors and windows, but be careful not to seal up window weep holes.
5. If leaking occurs along the siding’s J-channel trim, caulk under its edge at a 45-degree angle.
6. Glide loose siding back into place by sliding a vinyl siding removal tool along its edge.
Leaky siding serves as a good example of a problem that’s easier to avoid than solve. We recommend these simple tips for preventing water damage behind the siding on your home.
Even when you catch it right away, water behind siding causes long-lasting damage. Whether the problem is large or small, we take care of it. ServiceMaster by Zaba handles structural drying, interior tear-outs, mold removal and restoration from floors to ceilings and down in basements.
We know you’re proud of keeping your home looking its best inside and out. When you need help, count on us for the best water damage restoration services in Chicago: 773-647-1985.
The post Water Leaking Behind Siding? 6 Steps to Take Right Now appeared first on ServiceMaster Restoration by Zaba.
It starts with smoke filling the hallway. Suddenly, you spot flames, and they’re spreading quickly. Alarms are going off and sprinklers are coming on.
There’s a fire in your apartment building. Do you know what to do?
All renters need to be prepared. Over the years, we’ve helped tenants and landlords recover from fires in multi-unit properties all across Chicago.
Based on that experience, we’ve put together this guide outlining important information you need to know about apartment complex fires.
Let’s get started.

Every second counts. You want to stay calm, follow safety protocols and help others if possible.
Be ready with these 10 steps covering what to do if there is a fire in your apartment building.

Most renters aren’t sure what to expect after an apartment complex fire. However, the following tips can make it easier to deal with the aftermath of a fire in the building.
Your landlord’s responsibility after the fire is usually limited to building and unit structural damage. He or she is required to keep the property livable. Most cities clearly define tenants rights after an apartment fire.
For example, Chicago renters are protected by landlord-tenant laws at the state level. Landlords are expected to cover damages to the building through property insurance and to take care of repairs in a reasonable time frame.
You’re responsible for your personal belongings. You might be responsible for fire and smoke damage if the apartment fire was caused by your negligence. For instance, this could be the case if you overloaded the unit’s electrical outlets.

If a fire in the apartment building was accidentally caused by a tenant, you still have clear responsibilities as the landlord. First, make sure your renters are safe and have a place to stay.
Ask if anyone has information about what happened. Check with the fire officer on the scene, and stay in contact with him or her. The officer can share details about how the fire started.
Explain the situation to your insurance agent. Ask if additional information is needed to process your claim. It’s important to document that the fire was an accident and not due to a tenant’s negligence.
Finally, call a fire and smoke damage restoration contractor like ServiceMaster Restoration by Zaba. You want certified technicians on the scene as quickly as possible. Often, the restoration company can assist you with the fire damage claims process.
Dealing with the aftermath of an apartment fire with no renters insurance can be very costly. This type of insurance covers the replacement cost of your clothes, furniture and other personal belongings. It may also protect you against being sued for negligent actions that caused the fire.
Renters insurance typically covers out-of-pocket expenses for temporary housing. Ask your agent if your policy includes this loss-of-use provision before you need it. Also, check your coverage for secondary problems such as water and smoke damage to personal items.
It’s difficult to get smoke odors out of furniture and personal belongings. If your renters insurance covers smoke damage, leave the job to a professional restoration company.
If you decide to tackle smoke damage and smells by yourself, make sure you wear PPE. You’ll need to buy specialized smoke odor removal products. TSP, chemical sponges and degreasers are all very effective. However, it’s not a quick process. Be prepared to be patient.
It’s easy to feel overwhelmed after an apartment fire. Smoke, water and fire damage can make it seem impossible to return to your home. Even a small fire leaves behind soot and unpleasant odors. We can help.
ServiceMaster by Zaba provides expert fire damage services to Chicago renters and landlords.
You don’t have to face it alone. We’re standing by 24/7, ready for your call: 773-647-1985
The post Apartment Fire Damage: What You Need to Know appeared first on ServiceMaster Restoration by Zaba.